
For my final project at ITP, I spent quite a bit of time brainstorming around what I wanted to do. Seeing as it's my last project, I wanted to make sure that what I worked on would be memorable, enjoyable, but most of all: badass. I spent some time bouncing around various ideas. I knew I really wanted to work on doing something in a game engine, so that I could learn some new skills while building. One day, I was sitting with a good friend of mine on the subway, after an afternoon of goofing off and pondering the universe's deepest question: what if you could fight professionally on the subway and make money from it? Hence: BATTLE TRAIN was born.
The idea was pretty straightforward: we would tell the story of a guy who accidentally gets sucked into a world of illegal, literal underground fighting. We immediately got to work, as I started working on visuals and my friend worked on writing a seriously stellar opening act. As such, I made it my final mission to bring our vision to fruition.
I have experience working in Game Engines, specifically Unity. I have my game dev classes and my own curiosity to thank for that. Building games in Unity is fun, but I really wanted to make sure that I could prototype quickly, while also having visually appealing assets that I could leverage and quickly put into my scene without getting too sucked into the world of C# scripting. So I decided that Unreal Engine and Blueprints would be the place to do the work. This would be my first time doing some solo dev work in Unreal Engine, so I was excited to figure that out on my own. One problem: I have used Unreal Engine for Mocap purposes, kitbashing and environment building, but hadn't dabbled in interactivity and mechanics yet. But I would soon prepare myself to do so by doing the research throughout the Thesis timeline.
Having decided on the medium, I had to get to work on the crucial part: character design and vis dev!


A lot of quick and dirty early work. I wanted our main character to have a rebellious edge to him. Battle hardened, someone who had seen perhaps a bit too much for their age.
I am an avid illustrator, so putting together some early sketches of the character was definitely fun. I wanted to brign a comic book style to life, similar to Alberto Mielgo's work. His art style, and the art of the talented artists that worked on the Spider Verse movies served as key inspiration for what I wanted to work on. I wanted to see if I would be able to transfer a comic book style into a game engine and make it look good. But I was then faced with a new challenge: how am I going to make the characters and put them in a game engine?
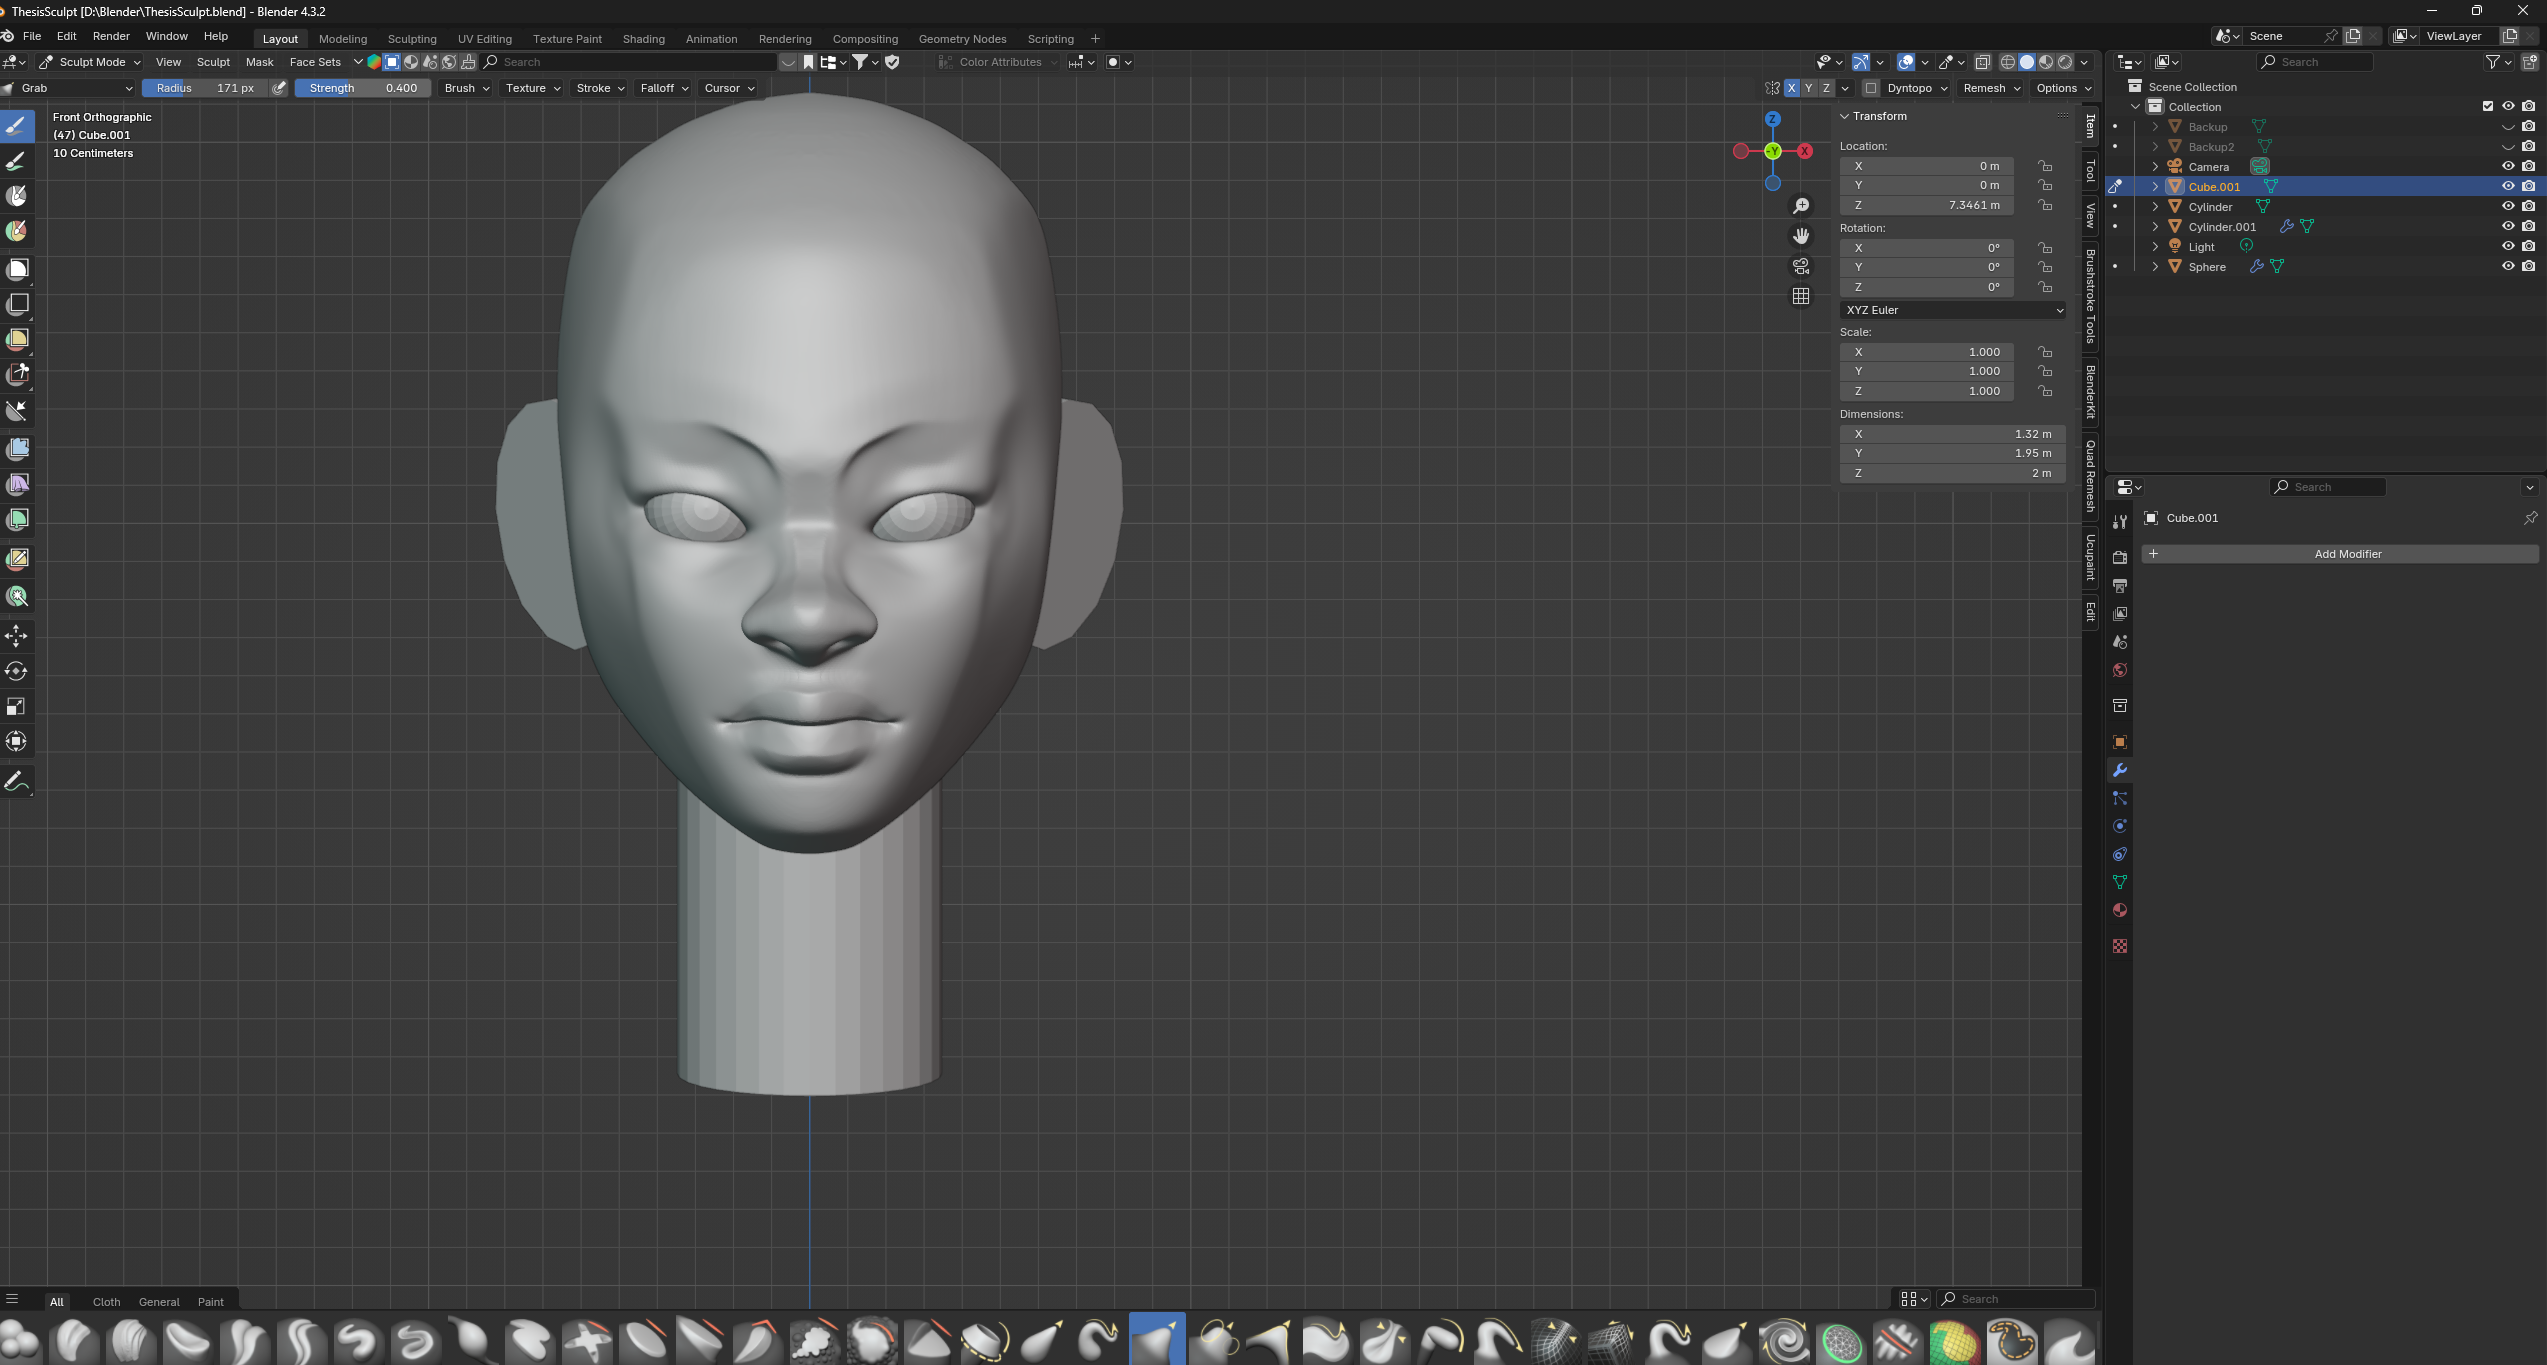
In order to create the mesh of the character, I had to be able to 3D model. At this point in the timeline, it's December and I know I need to figure it out. So, I started learning Blender. Hours upon hours of my December holiday was spent absorbing Blender information. Specifically learning Blender for character sculpting. Safe to say, it was a lot of hard work. But because I have years of illustration experience, understanding general human anatomy and the shapes that make up the body, I was able to get relatively clean results with my first sculpts. But here's the thing: I didn't start off with sculpting the character first. Why? Because I wanted to reach a level of Blender knowledge that I was satisfied with in order to make the character as closely to the vision that I had as I could. Below are some of the renders of characters I sculpted, rigged and textured, all in Blender. Bran Sculpts, Danny Mac 3D and Tiny Nocky on Youtube are absolute godsends when it comes to learning character creation in Blender.


.jpg)
Do any of these have anything to do with Battle Train? Absolutely not. And that's the point. In order to get to a suitable, comfortable level, I didn't want to bog myself down with the pressure of working on the larger Battle Train project. So working on smaller projects like these helped. I Worked on sculpting, retopology, UV unwrapping and texturing. Understanding shader nodes and materials. How to create dynamic lighting, to use lighting almost like a paint brush in the scene. My transition from a 2D to 3D artist was finally complete. After spending the entirety of December and a bit of January going over hours of tutorials and research, it was finally time for me to start making our main character for Battle Train. I could spend a long time talking about my learnings over this time. I initially thought retopology was something you could easily automate with existing tools. But I've come to appreciate doing retopology manually, as it helped build the habits I needed to fully grasp how meshes work, understanding edgeflow and doing things in an efficient manner. I still have a long way to go, but it was a very rewarding journey.
Having understood how to sculpt characters, the ultimate goal for me wasn't to build my entire character mesh from scratch this time. All I focused on where the facial features. I then took the liberty of using the Free Base Meshes provided by Blender in order to then create the rest of the body. The process is relatively straightforward, and didn't take as much time as I thought it would. First, sculpted the head of the character and created an early render for stylistic exploration. Kept things loose, but I just wanted to get a sense of wat direction I was going to go in. Call it a bit of previs work.


Once the head was done, I just retopologized then then bridged the gaps between the head mesh and the base mesh. Now for this, the process wasn't perfect, but good enough for our purposes.

Retopology took a bit of time to figure out, but it worked out in the end. What helped me get through it was spending some time watching other more experienced artists create their meshes. InnerWind on Youtube is great in how they share their entire character modeling process. No commentary, but it's all real time so it's easy to follow at your own pace. That's what I did!

I know. And this dilemma gave me a slight headache for a bit. So I figured that I should probably start from the basics and just start working on textures, then move onto clothes. So next came the fun part: UV Unwrapping and then texturing my model inSubstance Painter. As a 2D artist, I LOVE Substance Painter. It's amazing because you can paint directly onto your model an apply materials very quickly. In Blender, there are addons that you can use but those can take some time getting used to. There were some steps I had to take though. Retopologising means you lose all the juicy details of your base sculpt! This can be fixed by baking Normal Maps, which I did in Substance Painter. Again, following a really great tutorial on baking normals from a highpoly mesh to a low poly one.

Of course, because we're going from a comic book look, I sketched on the mesh directly, adding lines for certain details of the face, giving it form and texture. I then added deeper shadows in black. The key is to make sure that the lines that you put down have their roughness set up to the maximum (that's a parameter that decides how reflective/glossy your material is). Setting it to the max means that the lines are not affected by light, so they'll stand out in any given lighting scenario.
Now we move on to the clothes. Ah, the CLOTHES. I explored multiple different options. I didn't want to have to do Cloth simulation, though I explored it with what little willpower I had left that day after spending a few days trying to figure out how to properly wrap everything around my character and make sure it followed the armature. So I took a break from that again and just jumped into rigging the character in Mixamo without clothes for the time being, which produced some funny results.

Rigging in Mixamo gets things done quickly, and it's a cool tool. But I ended up jumping ship and using another tool called Accurig, with the suggestion of one of my professors. More on that later. Let's figure out how to get this man clothes.
I tried using a new tool 3D clothing design tool called Jinny. Think of it as a more user friendly version of Marvelous Designer. And of course, it worked in terms of getting clothes on the character, but there was a glaring issue: porting over the clothed character to Mixamo with the clothes on broke the meshes completely. Which wasn't a fun process to deal with. I agonised for a few days, as the dream of putting Battle Train together began to fade. But I was struck by a stroke of genius, and I am proud of how I pulled this off. They say the best artists steal (within reason of course). You can literally rip assets from existing game characters, and use them for your own purposes, provided you have the mesh and the textures required. ReadyPlayerMe has a free Avatar Builder. And what comes with an Avatar Builder? CLOTHES! CLOTHES GALORE! Complete with textures, normals, the works! I just had to do some tweaking in Blender to bring everything together and it all worked out!
One completed, I proceeded to do some rigging in Accurig, and I will sing the praises of that software for the rest of the documentation of this project, so please bear with me.
In order to get the Battle Train narrative going, I had to work on a Story Board. I had put one together for another class and figured that it would be a good way of getting feedback on the stylistic choices I was making around the art style and overall color palette that the experience would have. As a result, I spent soe time in Photoshop and taking photos of NYC using another video game (Spider-man 2) to stitch together the scene that I had in mind. It's a very rough animatic that helped me get out the general mood and tone I wanted the Battle Train trailer to have. And so I shared it on User Testing Day with around 5 other participants. This is a brief summary of the feedback that I had gotten:

Now here comes the ultimate question: If it's called BATTLE TRAIN, where is all the BATTLE? This is starting to look like more Train than Battle. There's a really great resource on youtube called Locodev. He's an absolute godsend and has a pretty affordabl patreon where he put together a battle system using animation graphs in Unreal Engine. Perfect for me, because I didn't have the time or resources to build one entirely from scratch. I subsribed immediately and got to work retargetting his animations to my mesh to implement the system he had created! Needless to say, it took a lot of trial and error. But it all worked out, as you can see below!
I was at GDC when we had to get on calls to discuss getting feedback from various ITP alumni! Special Thanks to all the alumni who gave me feedback on Battle Train in its current state! A brief summary of what was discussed:
We spent quite a bit of time delving deep into who the character is, what his motivations are for joining Battle Train and where he is emotionally, financially, physically and mentally.
One of the key pieces of feedback that I got about putting together the concept was that facial animation would be key to bringing the characters to life. Here was the problem: the character that I put together in blender has NO facial animation. None.
So now I was faced with a problem: how do I turn my character into one that I can animate in Blender or Unreal? What was the easiest option? I pondered on this for a while. I really didn't know how to go about it. In hindsight, I was overthinking the problem. I knew that Unreal Engine had LiveLink, a really powerful tool that can be used for facial capture when working with Metahumans. One problem: Roger's base mesh isn't a metahuman. So I started asking around: how do I turn a custom mesh into a Metahuman?
I got some solid advice, but unfortunately some of the solutions are locked behind pay walls. Mesh morpher is a seriously powerful tool and I would've loved to use it. Womp womp, it costs 50 bucks and I'm on a STUDENT BUDGET. So I had to get creative. There's a blender addon called Faceit. Initially I thought to explore that but then immediately abandoned the idea because I didn't want to have to create animations in blender and port them over to Unreal. I wanted to do everything IN Unreal. Until, one night, after tspending hours doing research on how to do this, I realised I was thinking about the problem the wrong way.
The real issue wasn't how do I turn Roger into a Metahuman. The question I should've been asking is how do I turn a Metahuman into Roger?

I used Roger's head as a template to create a Metahuman Identity in Unreal Engine. Then hopped into Metahuman Creator once it was uploaded there to then do some necessary prep. I removed the eyebrows and the hair, leaving us with a blank slate to then create stylized hand painted textures in Substance Painter. The end result is what you see below. All I did was replace the textures of our base Metahuman with my own, so it's less uncanny.

What also helps with getting this look is the Post Process material that I am using, as well as adding a Custom Depth Pass to the objects, that end up giving the mesh a flatter look.
Getting clothes on Roger was a simpler process, just moving back and forth between Blender and Unreal engine for fitting and transferring vertex group data for the skeletal meshes to function correctly. I learned a lot as a result of this too!

Now that I have Roger functioning and fully clothed, the next step is to get this metahuman into the Hubworld that I created!


.png)


.svg)
.png)
